How to connect Image Scanner CR to a computer?
Leave a message
As a supplier of the Image Scanner CR, I understand that setting up this advanced piece of equipment can be a daunting task for many users. In this blog post, I will guide you through the process of connecting the Image Scanner CR to a computer, ensuring that you can make the most of its capabilities.
Prerequisites
Before you begin the connection process, it's important to ensure that you have all the necessary components and that your computer meets the system requirements. Here's what you'll need:


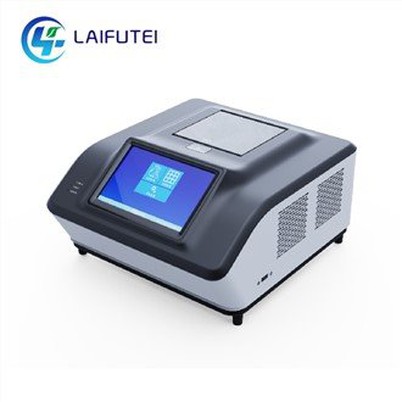
- Image Scanner CR: This is the main device that you'll be connecting to your computer. You can find more information about the Image Scanner CR on our website Image Scanner CR.
- Computer: Your computer should have a compatible operating system, such as Windows or macOS. It should also have enough processing power and memory to handle the software that comes with the Image Scanner CR.
- Cables: You'll need the appropriate cables to connect the Image Scanner CR to your computer. This may include a USB cable or an Ethernet cable, depending on the model of your scanner.
- Software: The Image Scanner CR comes with software that you'll need to install on your computer. This software is used to control the scanner and manage the scanned images.
Step-by-Step Guide
Now that you have everything you need, let's get started with the connection process. Follow these steps to connect the Image Scanner CR to your computer:
Step 1: Prepare Your Computer
Before you connect the Image Scanner CR to your computer, you need to prepare your computer by installing the necessary software. Here's how:
- Insert the software CD that came with the Image Scanner CR into your computer's CD drive.
- Follow the on-screen instructions to install the software. Make sure to read the license agreement carefully and accept the terms before proceeding.
- Once the installation is complete, restart your computer to ensure that the software is properly installed.
Step 2: Connect the Scanner to Your Computer
Now that your computer is ready, it's time to connect the Image Scanner CR to your computer. Here's how:
- Turn off the Image Scanner CR and your computer.
- Connect one end of the USB cable or Ethernet cable to the scanner and the other end to your computer.
- Turn on the Image Scanner CR and wait for it to boot up.
- Turn on your computer and wait for it to start up.
Step 3: Configure the Scanner Settings
Once the scanner is connected to your computer, you need to configure the scanner settings to ensure that it works properly. Here's how:
- Open the software that you installed in Step 1.
- Look for the scanner settings or preferences option in the software.
- Select the Image Scanner CR from the list of available scanners.
- Configure the scanner settings, such as the resolution, color mode, and file format. You can usually find these settings in the scanner settings or preferences option.
- Save the settings and close the scanner settings or preferences window.
Step 4: Test the Scanner
Now that you've configured the scanner settings, it's time to test the scanner to make sure that it's working properly. Here's how:
- Place a document or image on the scanner bed.
- Open the software that you installed in Step 1.
- Look for the scan option in the software.
- Select the scan option and wait for the scanner to scan the document or image.
- Once the scan is complete, the scanned document or image should appear on your computer screen.
Troubleshooting Tips
If you encounter any problems during the connection process or when using the Image Scanner CR, here are some troubleshooting tips that may help:
- Check the cables: Make sure that the cables are properly connected to the scanner and your computer. Try unplugging and plugging the cables back in to ensure a secure connection.
- Restart the scanner and your computer: Sometimes, simply restarting the scanner and your computer can resolve connectivity issues.
- Update the software: Check the manufacturer's website for software updates for the Image Scanner CR. Installing the latest software can often fix bugs and improve performance.
- Contact technical support: If you're still having problems, contact the technical support team for the Image Scanner CR. They can provide you with further assistance and troubleshooting tips.
Other Animal Diagnostic Imaging Products
In addition to the Image Scanner CR, we also offer a range of other animal diagnostic imaging products, including Animal Digital Dental DR and Animal Imaging Diagnostic CT. These products are designed to provide high-quality imaging for veterinary clinics and animal hospitals.
Conclusion
Connecting the Image Scanner CR to a computer is a relatively straightforward process that can be completed in a few simple steps. By following the steps outlined in this blog post, you should be able to connect the scanner to your computer and start using it to scan documents and images. If you have any questions or need further assistance, please don't hesitate to contact us. We're here to help you make the most of your Image Scanner CR.
If you're interested in purchasing the Image Scanner CR or any of our other animal diagnostic imaging products, please contact us to discuss your needs and arrange a demonstration. We look forward to working with you to provide the best imaging solutions for your veterinary practice.
References
- Manufacturer's manual for the Image Scanner CR
- Technical support documentation for the Image Scanner CR