How to make a DIY stainless steel cat cage?
Leave a message
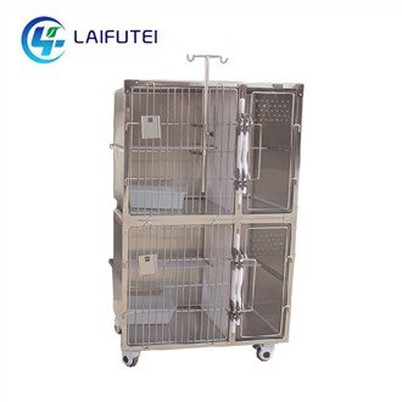
Hey there, fellow cat lovers! I'm stoked to share with you how to make a DIY stainless steel cat cage. As a supplier of Stainless Steel Cat Cages, I've seen firsthand the benefits of these sturdy and durable enclosures for our furry friends. Not only are they long-lasting, but they're also easy to clean and maintain, which is a huge plus when it comes to keeping your cat's living space fresh and hygienic.
Why Choose Stainless Steel?
Before we dive into the DIY process, let's talk about why stainless steel is such a great material for cat cages. First off, it's incredibly strong and resistant to corrosion, so you don't have to worry about it rusting or breaking down over time. This means your cat cage will last for years, providing a safe and secure home for your feline companion.
Stainless steel is also non-porous, which makes it easy to clean and disinfect. You can simply wipe it down with a mild soap and water solution, or use a pet-safe disinfectant to keep it germ-free. This is especially important if you have a cat with allergies or other health issues, as it helps to reduce the risk of bacteria and other contaminants building up in the cage.
Another great thing about stainless steel is that it's a very versatile material. You can customize your cat cage to fit your specific needs and preferences, whether you're looking for a simple single-level cage or a multi-level structure with plenty of room for your cat to play and explore. Plus, stainless steel comes in a variety of finishes, so you can choose one that matches your home decor and style.
Tools and Materials You'll Need
Now that you know why stainless steel is the way to go, let's talk about the tools and materials you'll need to make your DIY cat cage. Here's a list of the essentials:
- Stainless steel tubing or wire mesh
- Stainless steel connectors or brackets
- Welding equipment (if using tubing) or wire cutters and pliers (if using wire mesh)
- Measuring tape
- Drill and drill bits
- Screwdriver
- Hinges and latches
- Plywood or other suitable material for the floor and shelves
- Carpet or other soft material for the floor and shelves (optional)
- Paint or other finish (optional)
You can find most of these tools and materials at your local hardware store or online. Just make sure you choose high-quality products that are designed for use with stainless steel, as this will ensure that your cat cage is strong and durable.


Step-by-Step Guide to Making Your DIY Cat Cage
Now that you have all the tools and materials you need, it's time to start building your DIY cat cage. Here's a step-by-step guide to help you through the process:
Step 1: Plan Your Design
Before you start cutting and welding, it's important to plan out your cat cage design. Think about the size and shape of the cage, as well as the number of levels and compartments you want to include. You can use a piece of paper or a computer program to sketch out your design and make sure everything fits together properly.
Step 2: Cut the Stainless Steel Tubing or Wire Mesh
Once you have your design planned out, it's time to cut the stainless steel tubing or wire mesh to the appropriate lengths. If you're using tubing, you'll need to use a welding machine to join the pieces together. If you're using wire mesh, you can use wire cutters and pliers to cut and shape the mesh.
Step 3: Assemble the Frame
Once you have all the pieces cut, it's time to assemble the frame of the cat cage. If you're using tubing, you'll need to use welding equipment to join the pieces together. If you're using wire mesh, you can use stainless steel connectors or brackets to attach the mesh to the frame.
Step 4: Add the Shelves and Platforms
Once the frame is assembled, it's time to add the shelves and platforms to the cat cage. You can use plywood or other suitable material to create the shelves and platforms, and then attach them to the frame using screws or other fasteners. You can also add carpet or other soft material to the shelves and platforms to make them more comfortable for your cat.
Step 5: Install the Hinges and Latches
Once the shelves and platforms are in place, it's time to install the hinges and latches on the cage door. You can use a drill and drill bits to make the holes for the hinges and latches, and then attach them to the cage using screws or other fasteners.
Step 6: Add the Floor
Once the cage is assembled, it's time to add the floor. You can use plywood or other suitable material to create the floor, and then attach it to the frame using screws or other fasteners. You can also add carpet or other soft material to the floor to make it more comfortable for your cat.
Step 7: Finish the Cage
Once the cage is assembled and the floor is in place, it's time to finish the cage. You can paint or stain the cage to match your home decor and style, or you can leave it in its natural stainless steel finish. You can also add other features to the cage, such as toys, scratching posts, and hiding places, to make it more fun and engaging for your cat.
Tips and Tricks
Here are some tips and tricks to help you make your DIY cat cage a success:
- Measure twice, cut once. This is a basic rule of DIY, but it's especially important when working with stainless steel. Make sure you measure all the pieces carefully before you cut them, as it's much easier to make adjustments at this stage than it is after the pieces are cut.
- Use high-quality materials. As I mentioned earlier, stainless steel is a great material for cat cages, but not all stainless steel is created equal. Make sure you choose high-quality tubing or wire mesh that is thick enough to support the weight of your cat and strong enough to withstand the wear and tear of daily use.
- Take your time. Building a DIY cat cage takes time and patience, so don't rush the process. Make sure you take your time to measure, cut, and assemble the pieces correctly, and don't be afraid to ask for help if you need it.
- Test the cage before you put your cat in it. Once you've finished building the cage, it's important to test it to make sure it's safe and secure. Check all the joints and connections to make sure they're tight and secure, and make sure the door opens and closes smoothly. You can also put a blanket or other soft material in the cage and let your cat explore it for a few hours to make sure it's comfortable and safe.
Where to Find More Information
If you're interested in learning more about DIY cat cages or other cat-related topics, there are plenty of resources available online. You can check out websites like Stainless Steel Hospital Pet Cage, Combined Stainless Steel Animal Cages, and No Door Pet Bath Sink for more information and inspiration.
You can also join online communities and forums where cat owners and DIY enthusiasts share their tips, tricks, and experiences. These communities can be a great source of support and inspiration, and they can also help you connect with other people who are interested in the same things as you.
Contact Us for Purchasing
If you're interested in purchasing a pre-made stainless steel cat cage or have any questions about our products, feel free to reach out to us. We're here to help you find the perfect cage for your furry friend and can offer guidance on the best options based on your cat's needs and your preferences.
References
- "DIY Cat Cage Ideas." Various DIY Blogs and Forums.
- "Stainless Steel in Pet Products." Industry Reports on Pet Equipment Materials.
- "Cat Cage Design and Functionality." Studies on Feline Behavior and Housing.